# Mockups
Build HTML mockups in Nimbalyst using your docs, code, and sessions as context, then hand the same mockups to your agent to implement.
A mockup is a visual design for a screen, stored as a real HTML file (`.mockup.html`) in your project. Because your agent builds mockups with your docs, code, and sessions as context, and the result is plain HTML and CSS, the same file works for designing a feature and for implementing it. No copy/paste between a design tool and your codebase.
See the [mockups feature page](https://nimbalyst.com/features/mockups/) for how mockups feed back into implementation, and [UI mockups](https://nimbalyst.com/use-cases/ui-mockups/) for a full example.
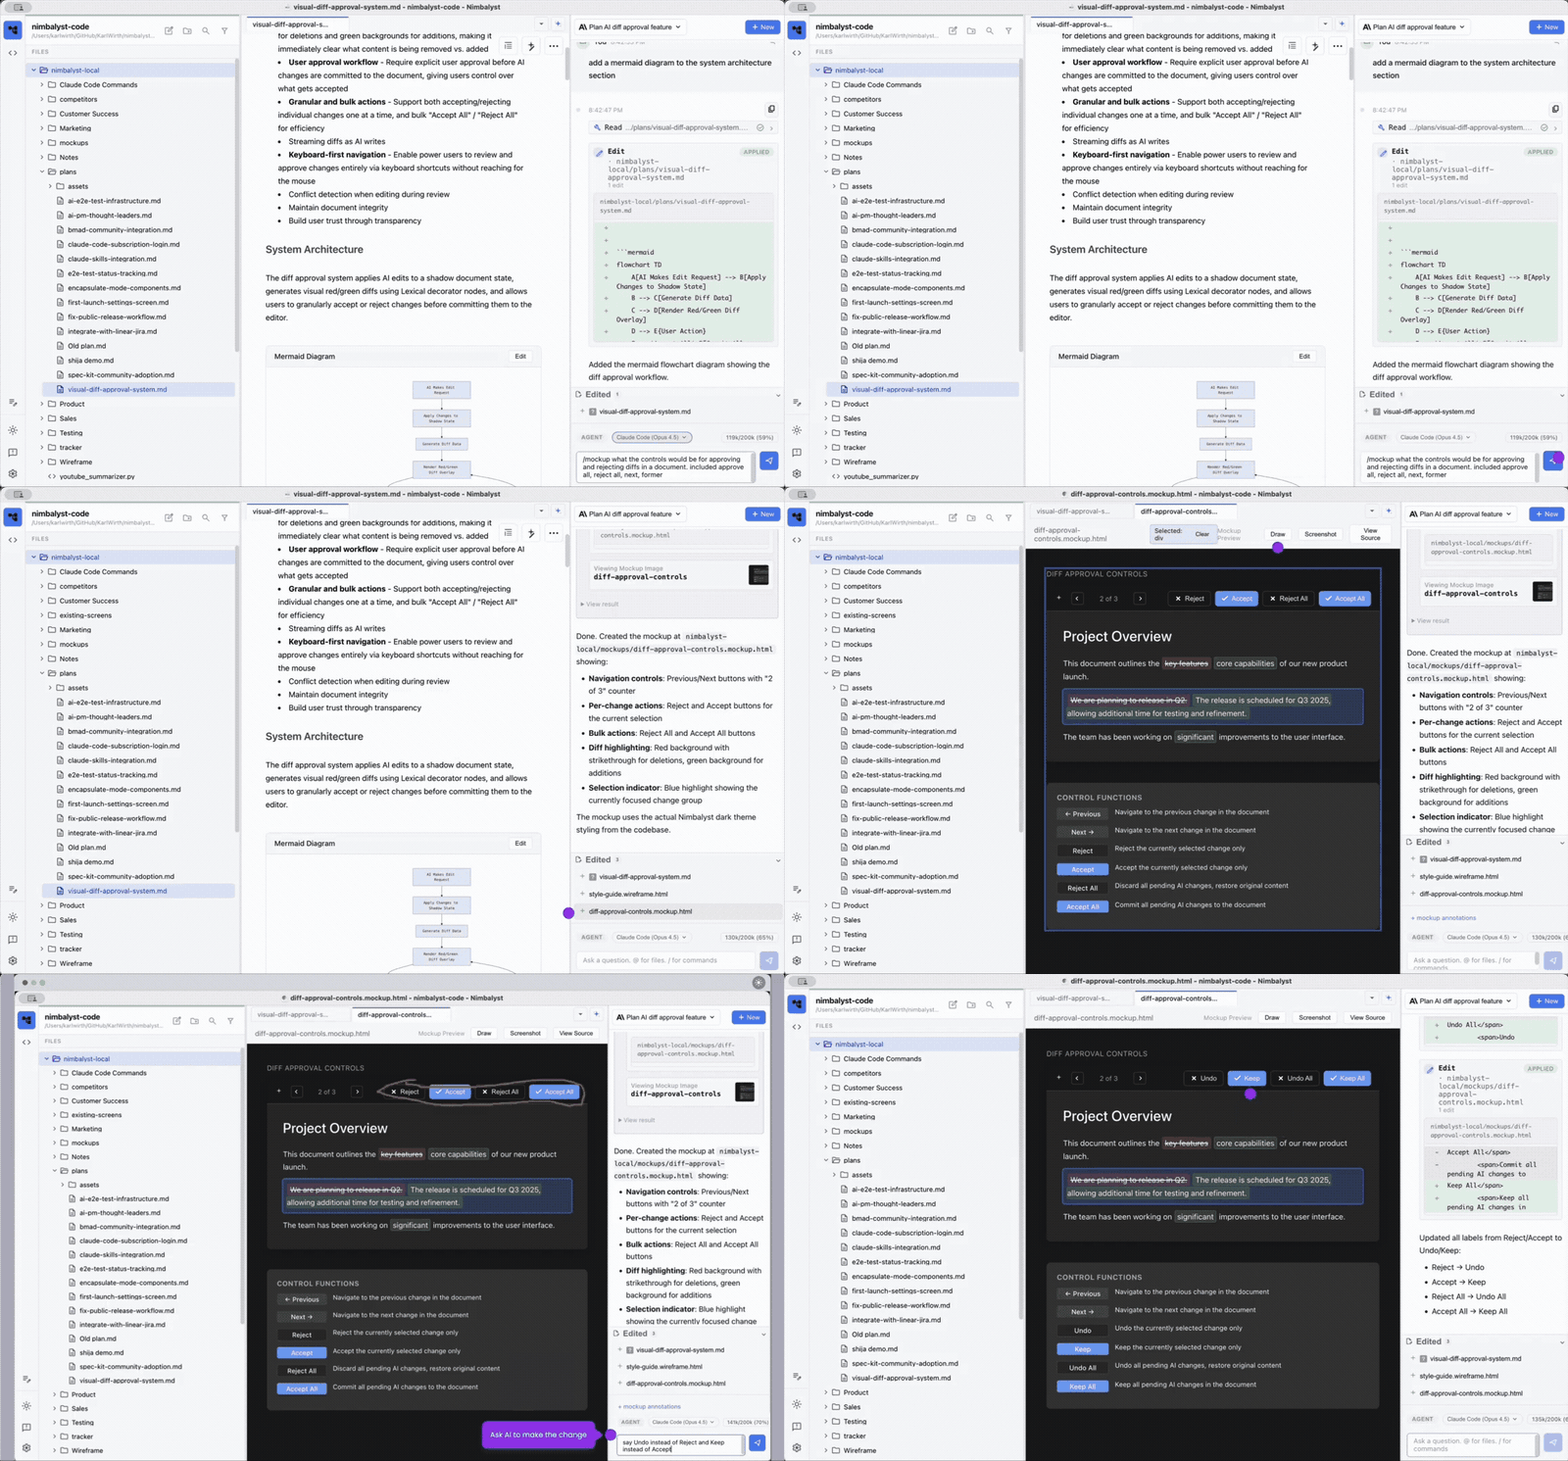
Creating a mockup from the agent chat with the /mockup command, using the open document as context.
### Create a Mockup
1. Select **New > New Mockup**, or type `/mockup` in the chat.
2. In the agent chat, describe the mockup you want created.
3. Reference documents with **@**, and paste images or screenshots into the chat for the agent to work from.
### Edit the Mockup
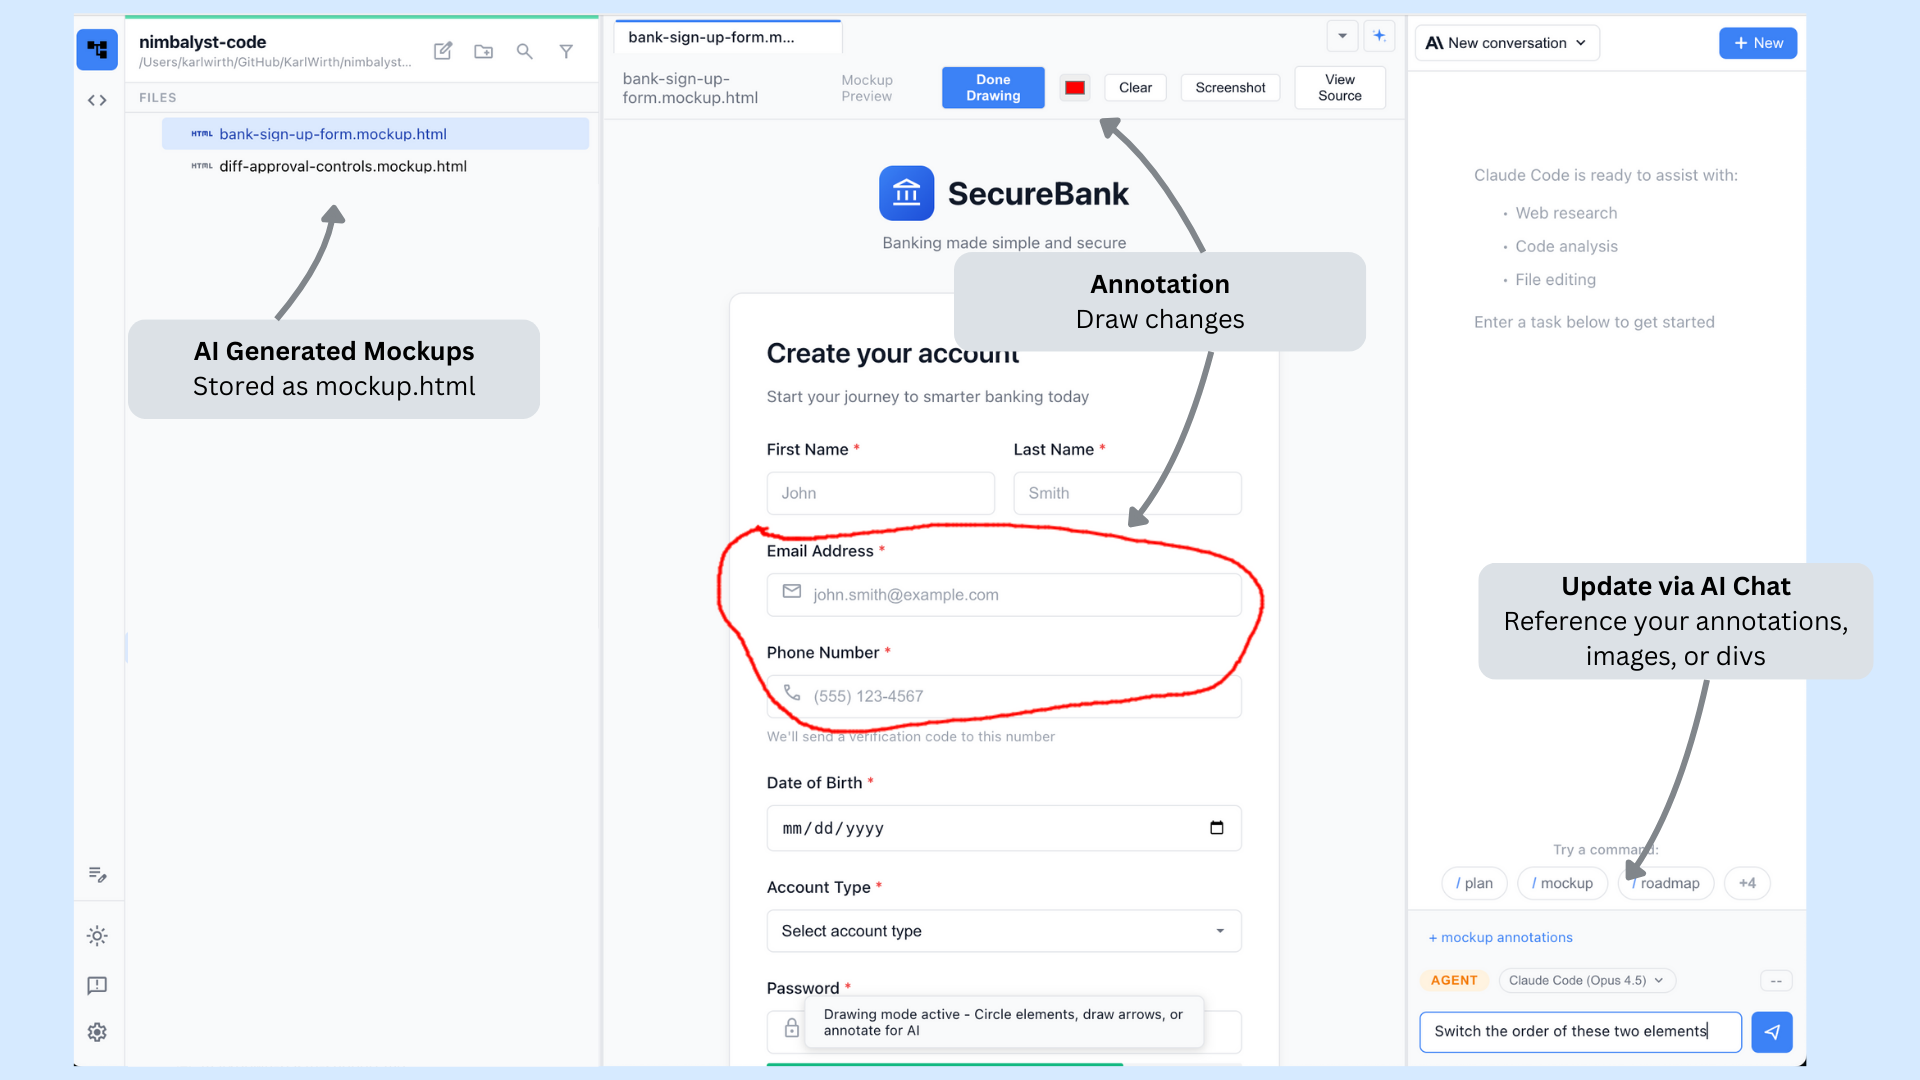
Click a `.mockup.html` file to open it in the mockup editor.
The mockup editor showing a sign-up form mockup with a hand-drawn red annotation circling two fields, drawing tools in the toolbar, and the agent chat on the right.
Edit it in three ways:
* Directly in the HTML
* By selecting an element and asking the AI to modify it
* By drawing annotations on the mockup and then asking the AI to make the change you marked
### Multi-Screen Flows
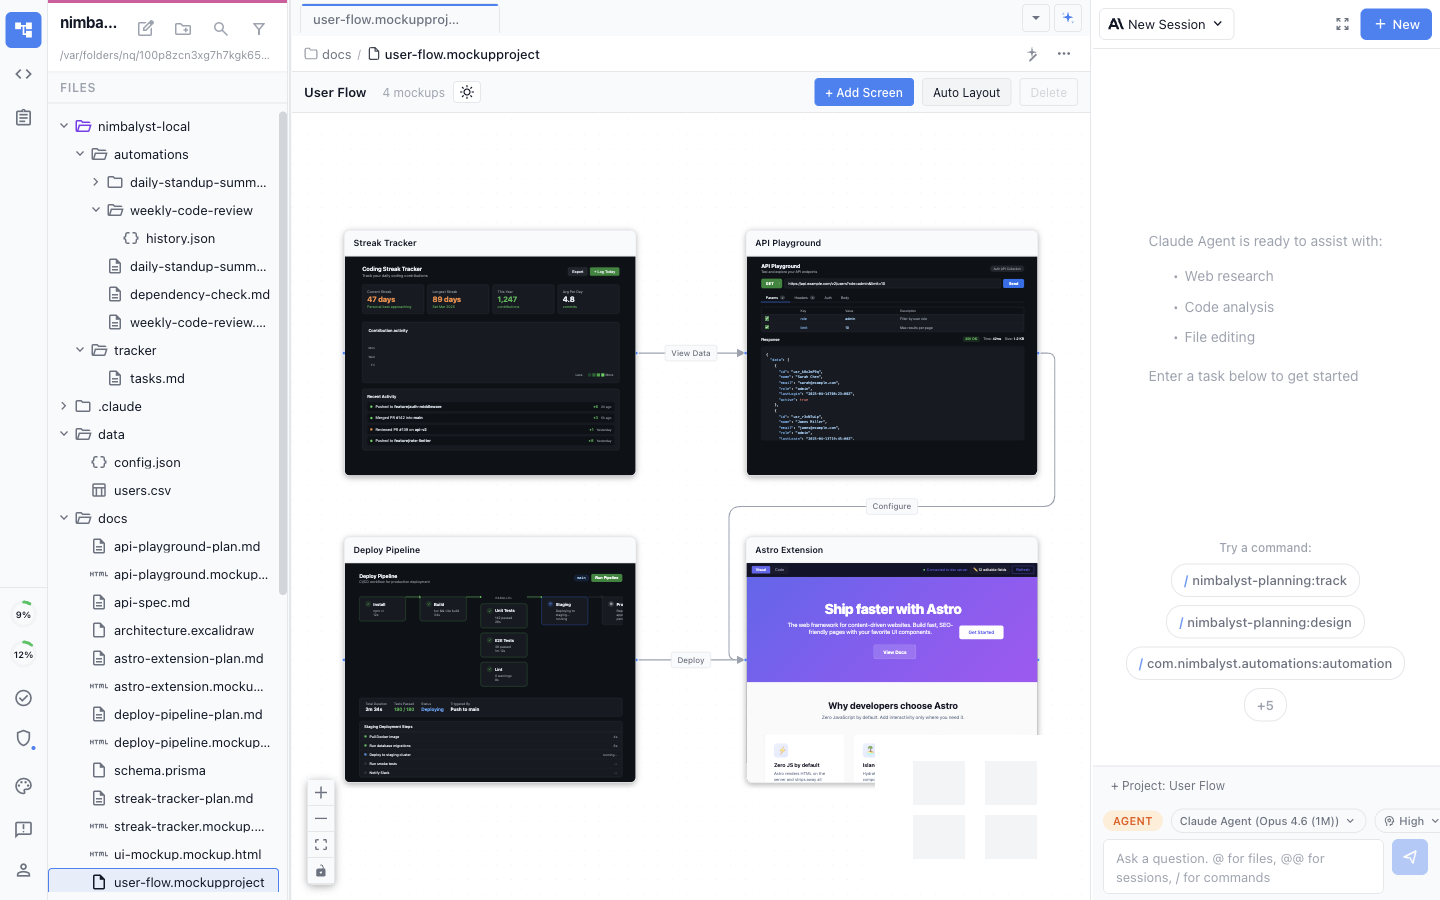
Put multiple mockup screens on a [Project Canvas](https://nimbalyst.com/docs/visual-editors-powered-by-ai/canvas/) to design a complete flow: checkout, onboarding, settings, or anything else that spans more than one screen.
A mockup project canvas holding four screens connected by labelled arrows, with Add Screen and Auto Layout buttons in the toolbar.
On the canvas:
* Drag screens around to arrange them spatially
* Draw connections between screens to show navigation flow, and label them (click, hover, navigate)
* Add existing `.mockup.html` files as live file cards
* Ask the agent to create the screens and arrange them for you
* Click into a card to edit the mockup in place
Project boards are stored as `.canvas` files. Older `.mockupproject` files open in a compatibility view that can convert them to the current Canvas format.
### Insert a Mockup into a Markdown Document
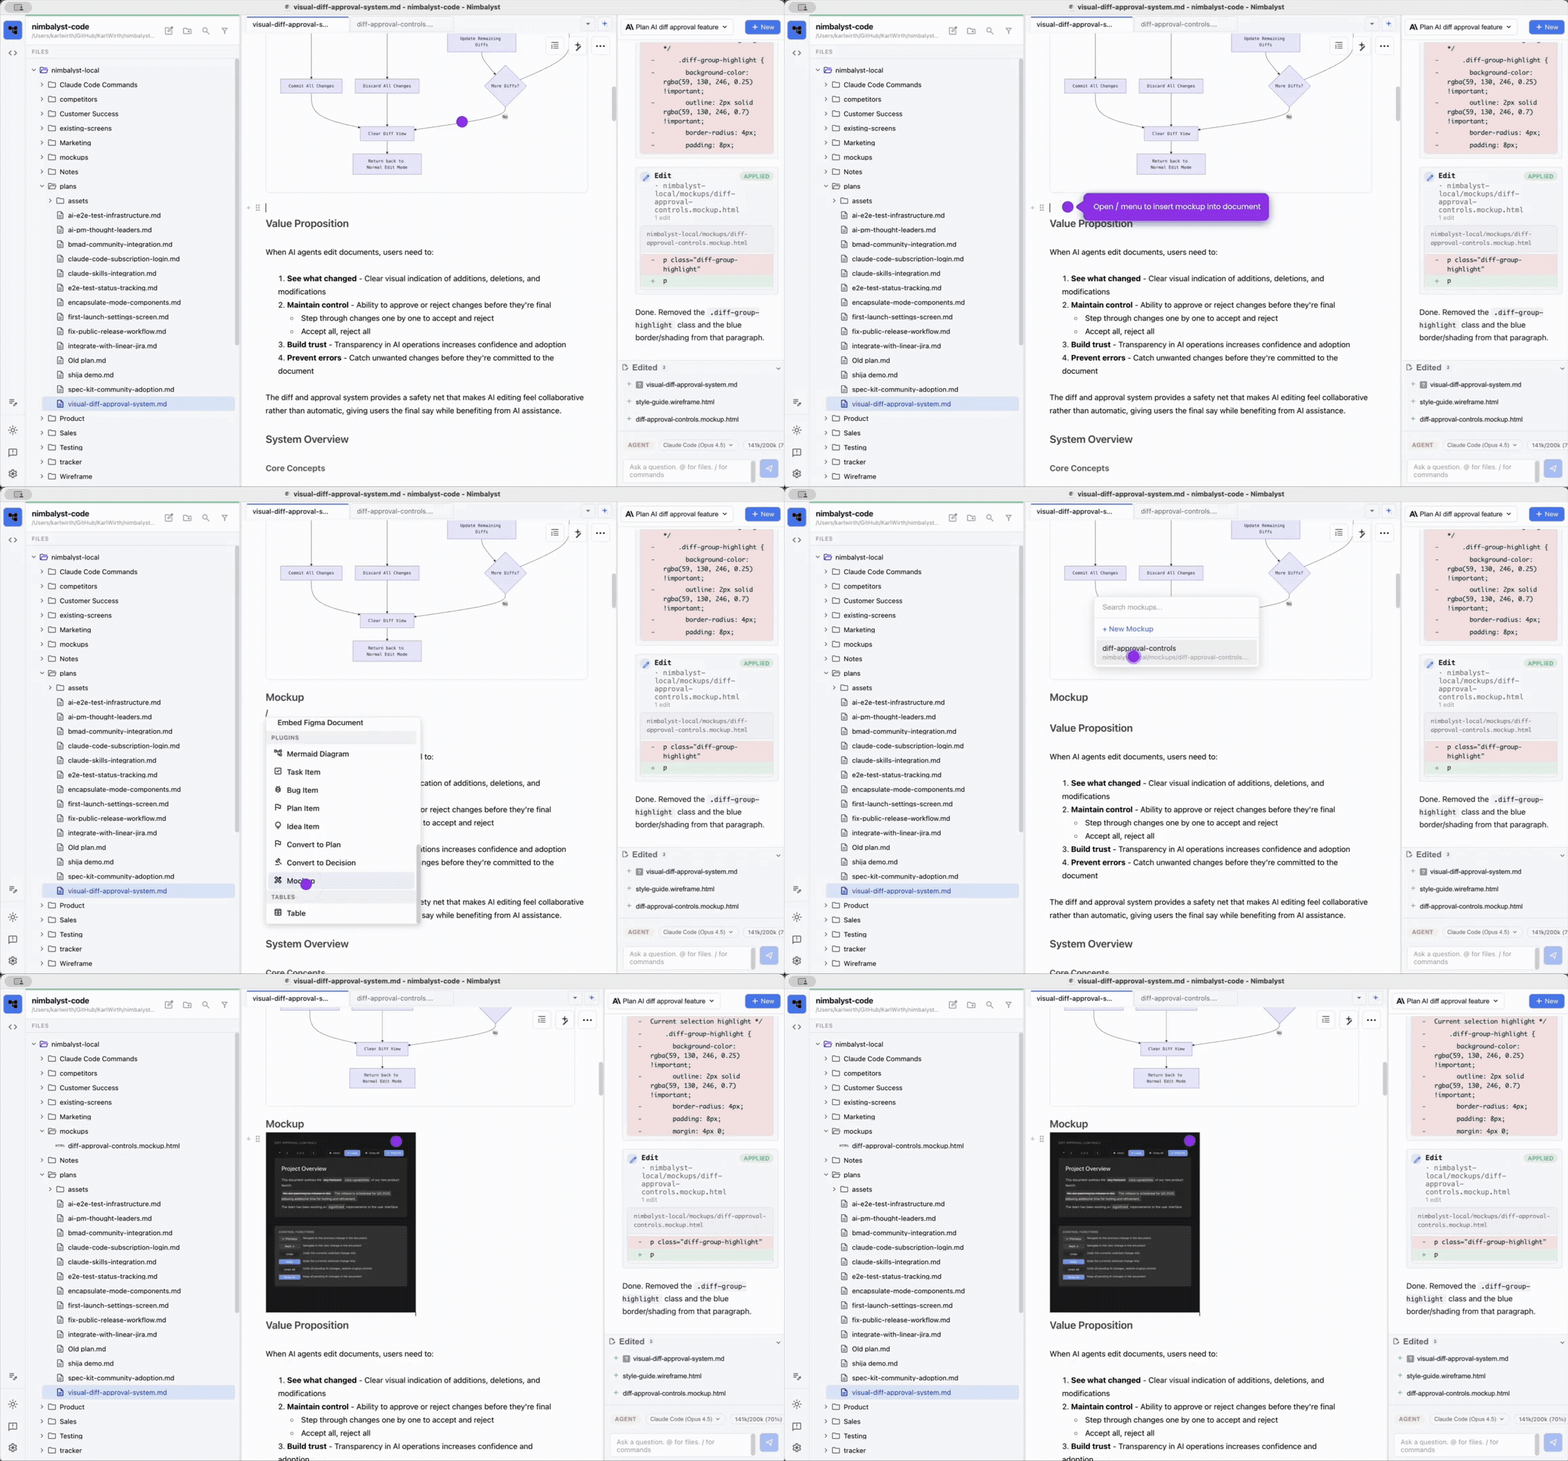
A markdown document with a mockup embedded inline, edited alongside the agent chat.
Type **/** in a document and insert a mockup. Click the embedded mockup to edit it in place.
### File Type and Storage
Mockups are `.mockup.html` files. By default new mockups are saved under `nimbalyst-local/mockups/` in your project, but you can keep them anywhere.
## Working with the AI
### Tips for Better Results
* **Be specific about layout**: "Two-column layout with 30% sidebar" beats "add a sidebar"
* **Reference known products**: "Style it like the Stripe dashboard" gives the AI a clear design reference
* **Describe interactions**: "When hovering over a row, show a blue highlight and a delete icon on the right"
* **Iterate in small steps**: make one change at a time so you can evaluate each iteration
### What the AI Sees
When you ask the AI to edit a mockup, it:
1. Captures a screenshot of the current rendered mockup
2. Reads the HTML source code
3. Sees any annotations you've drawn
4. Understands which element you've selected (if any)
This multi-modal context means you can say "make the thing I circled bigger" and the AI knows what you mean.
### Design-to-Code Workflow
Mockups are real HTML and CSS, which makes them a useful bridge between design and implementation:
1. **Design in mockups**: iterate on the visual design with AI assistance
2. **Review with stakeholders**: share the rendered mockup for feedback
3. **Extract patterns**: use the mockup's HTML/CSS as a reference when implementing the production UI
4. **Maintain alongside code**: keep mockups updated as the product evolves
## File Format
Mockups use standard HTML with inline CSS. No build tools or frameworks required.
```html
Settings
```
Using `var(--nim-*)` CSS variables ensures your mockup adapts to light and dark themes automatically.