From Your Agent to the App to Your Team
How a Nimbalyst Wiki grows: start in Claude Code, Codex, Cowork, Cursor, or VS Code with no app, open the same files in the Nimbalyst app, then share the wiki with your team on Nimbalyst Teams.
The Nimbalyst Wiki is one set of pages that you can reach three ways. Most people start in their coding agent, open the wiki in the Nimbalyst app when they want visual editing, and share it with their team when other people need it. Each step keeps everything you already have.
| Step | Where you work | What it adds | Needs |
|---|---|---|---|
| 1. Your coding agent and browser | Claude Code, Codex (CLI or app), Cowork, Cursor, VS Code, or any other MCP agent, plus the wiki in your browser | Your agent writes the wiki as markdown files in your repo; you read and edit it in the browser, including drawings, mind maps, and mockups | The plugin or the nim CLI. Free, no account |
| 2. The Nimbalyst app | Wiki mode in the app (Cmd+D) | Visual editing of mockups, diagrams, and 2x2s, typed tables and boards, and the wiki next to your sessions, tasks, and code | The free app |
| 3. Your team | The Team section of Wiki mode, the browser console, and every teammate's agents | One shared wiki edited in real time, comments, shared types, and attributed decisions | Nimbalyst Teams. Paid, free during beta |
You don't have to take the steps in order. You can start in the app, and your agents keep working on the same wiki after you open it there.
Step 1: Start in your coding agent
Install the Nimbalyst Wiki plugin in Claude Code or the Codex CLI, or add nim mcp to the Codex app, Cowork, Cursor, VS Code, or another MCP agent, and ask it to start a wiki for your repo. To read and edit it in your browser, ask the plugin to open it, or run nim wiki serve.
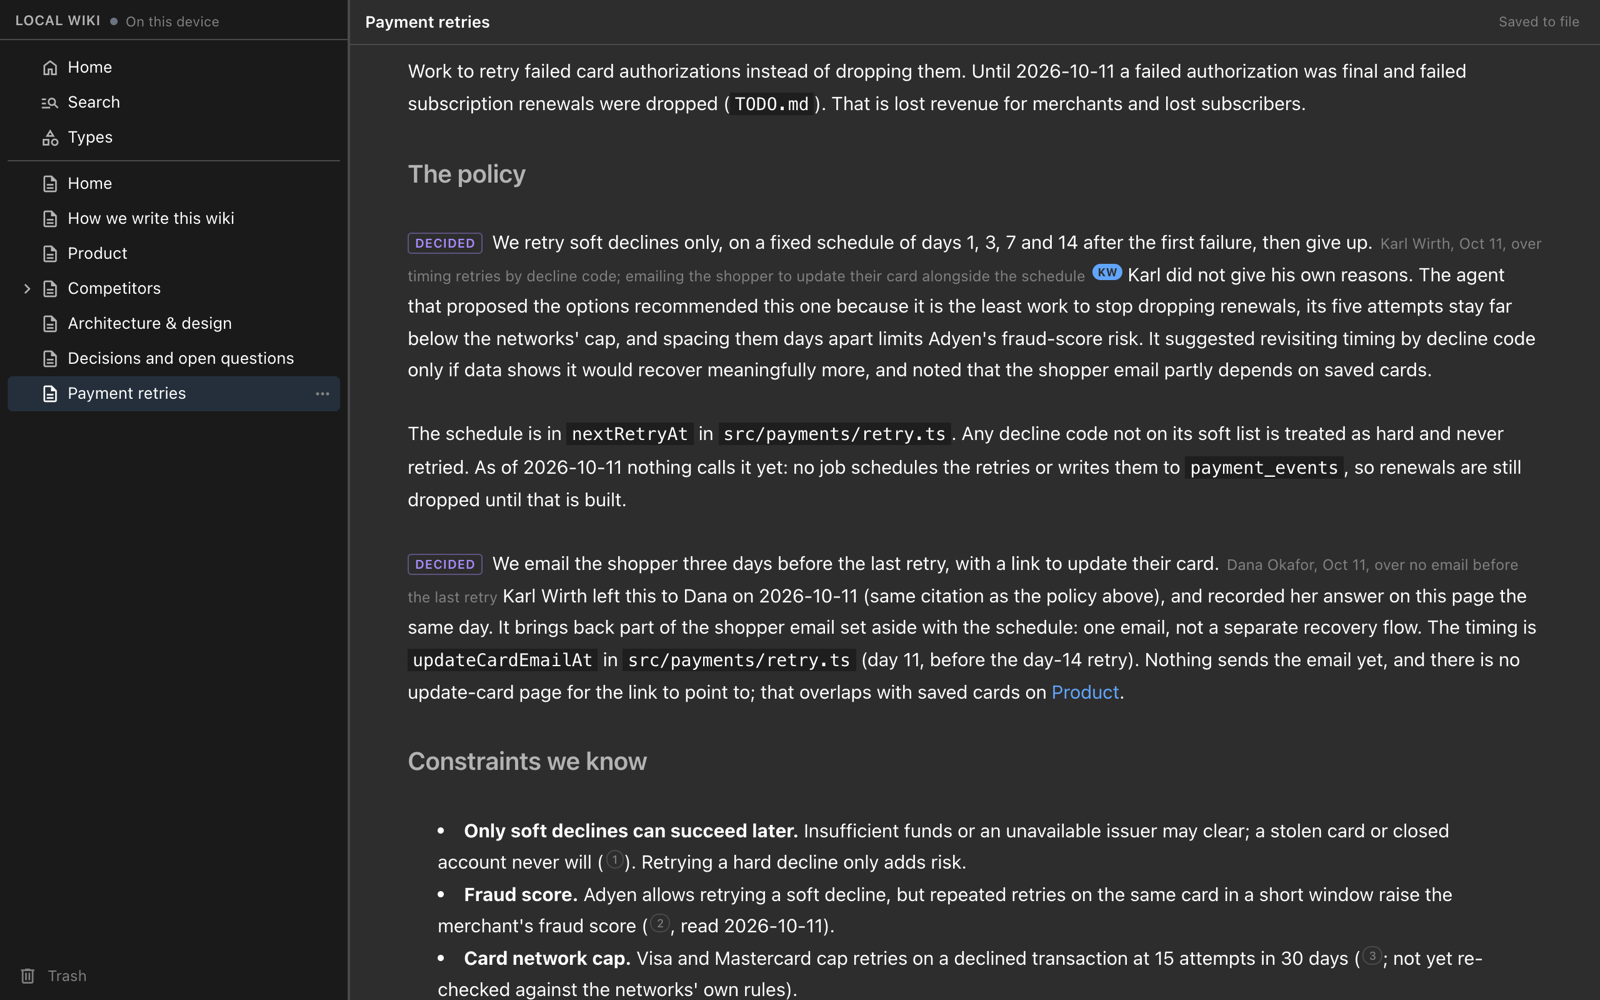
Decisions your agent captured, marked in the page they affect, read in the browser with no app installed.
The wiki is a folder of markdown files, nimbalyst-local/wiki by default. See Start in Your Coding Agent.
Step 2: Open it in Nimbalyst
Open the same project in Nimbalyst and press Cmd+D. Your pages are in the Local section, read from the same files. There is nothing to import or convert.
What changes:
- The wiki sits next to your sessions, tasks, and code, and its pages hold mockups, Excalidraw drawings, and other editor files, all editable in place.
- Types show as live tables, boards, lists, and timelines you can place in any page.
- Agents you run in Nimbalyst use the wiki tools directly, and the Nimbalyst Wiki plugin stands aside inside the app so each page has one write path.
- Your coding agents outside the app keep working on the same files, and the app shows their changes right away.
See Wiki in the Nimbalyst App and Pages, Types, and Fields.
Step 3: Share it with your team
Run /nimbalyst-wiki:team in Claude Code, or ask Codex to move the wiki to Nimbalyst Teams. Your agent installs the team add-on, signs you in, creates or picks the team, moves every page with its drawings, typed pages, types, and images, and offers to invite your teammates. Teammates read and edit the team wiki in the browser at console.nimbalyst.com, and their own agents write to the same pages.
In the app, the Team section appears in Wiki mode above Local once the project is shared, and Move to Team... shares a plain Local page with the plain pages under it.
See Nimbalyst Wiki Teams and Move Your Local Wiki to Teams.
Keeping a private wiki next to the team wiki
Your Local wiki stays after you share a project. Keep personal notes there and team decisions in the Team section. When a repository has both, the plugin in Claude Code or Codex asks once per session which one to use, and nim wiki takes --local or --team.