Mockups
Build HTML mockups in Nimbalyst using your docs, code, and sessions as context, then hand the same mockups to your agent to implement.
A mockup is a visual design for a screen, stored as a real HTML file (.mockup.html) in your project. Because your agent builds mockups with your docs, code, and sessions as context, and the result is plain HTML and CSS, the same file works for designing a feature and for implementing it. No copy/paste between a design tool and your codebase.
See the mockups feature page for how mockups feed back into implementation, and UI mockups for a full example.
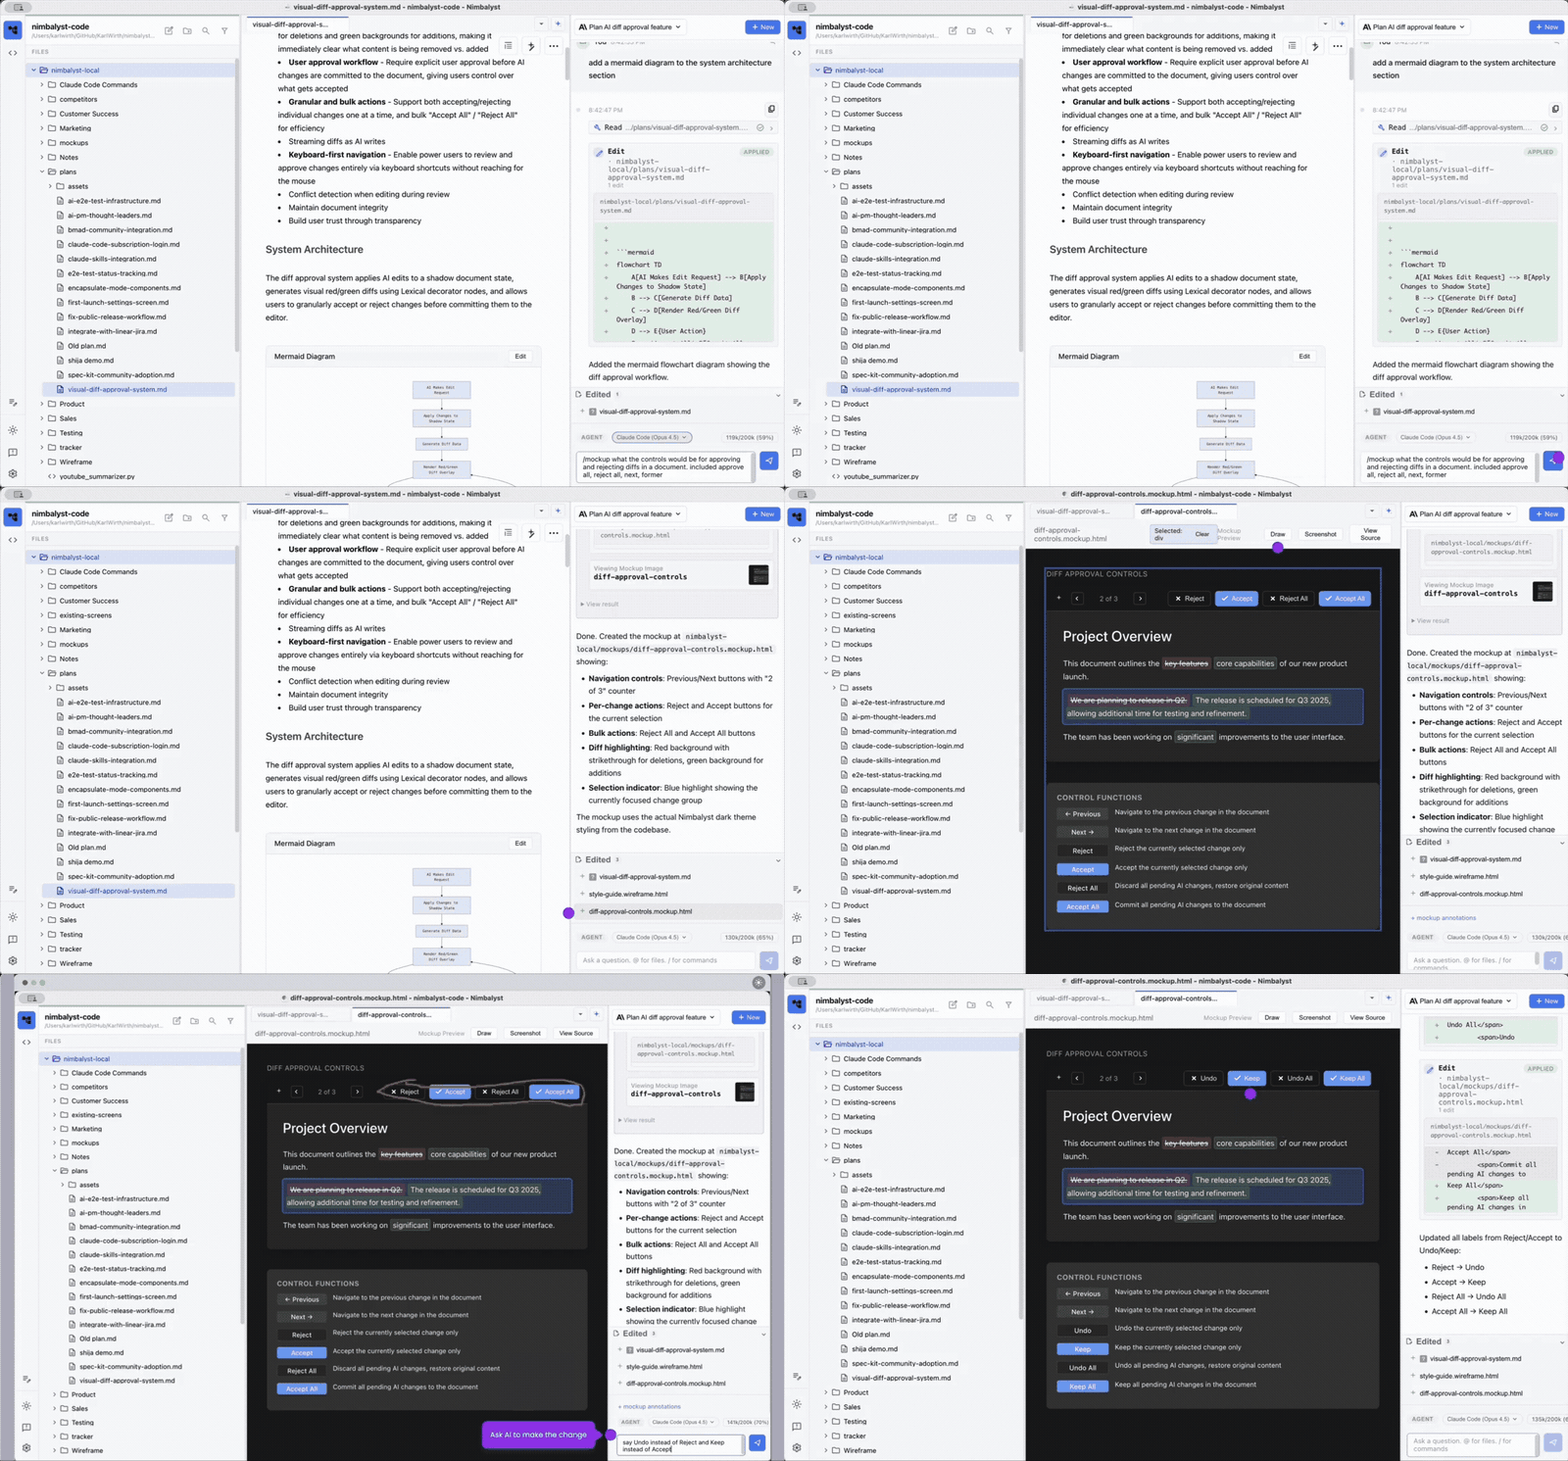
Create a Mockup
- Select New > New Mockup, or type
/mockupin the chat. - In the agent chat, describe the mockup you want created.
- Reference documents with @, and paste images or screenshots into the chat for the agent to work from.
Edit the Mockup
Click a .mockup.html file to open it in the mockup editor.
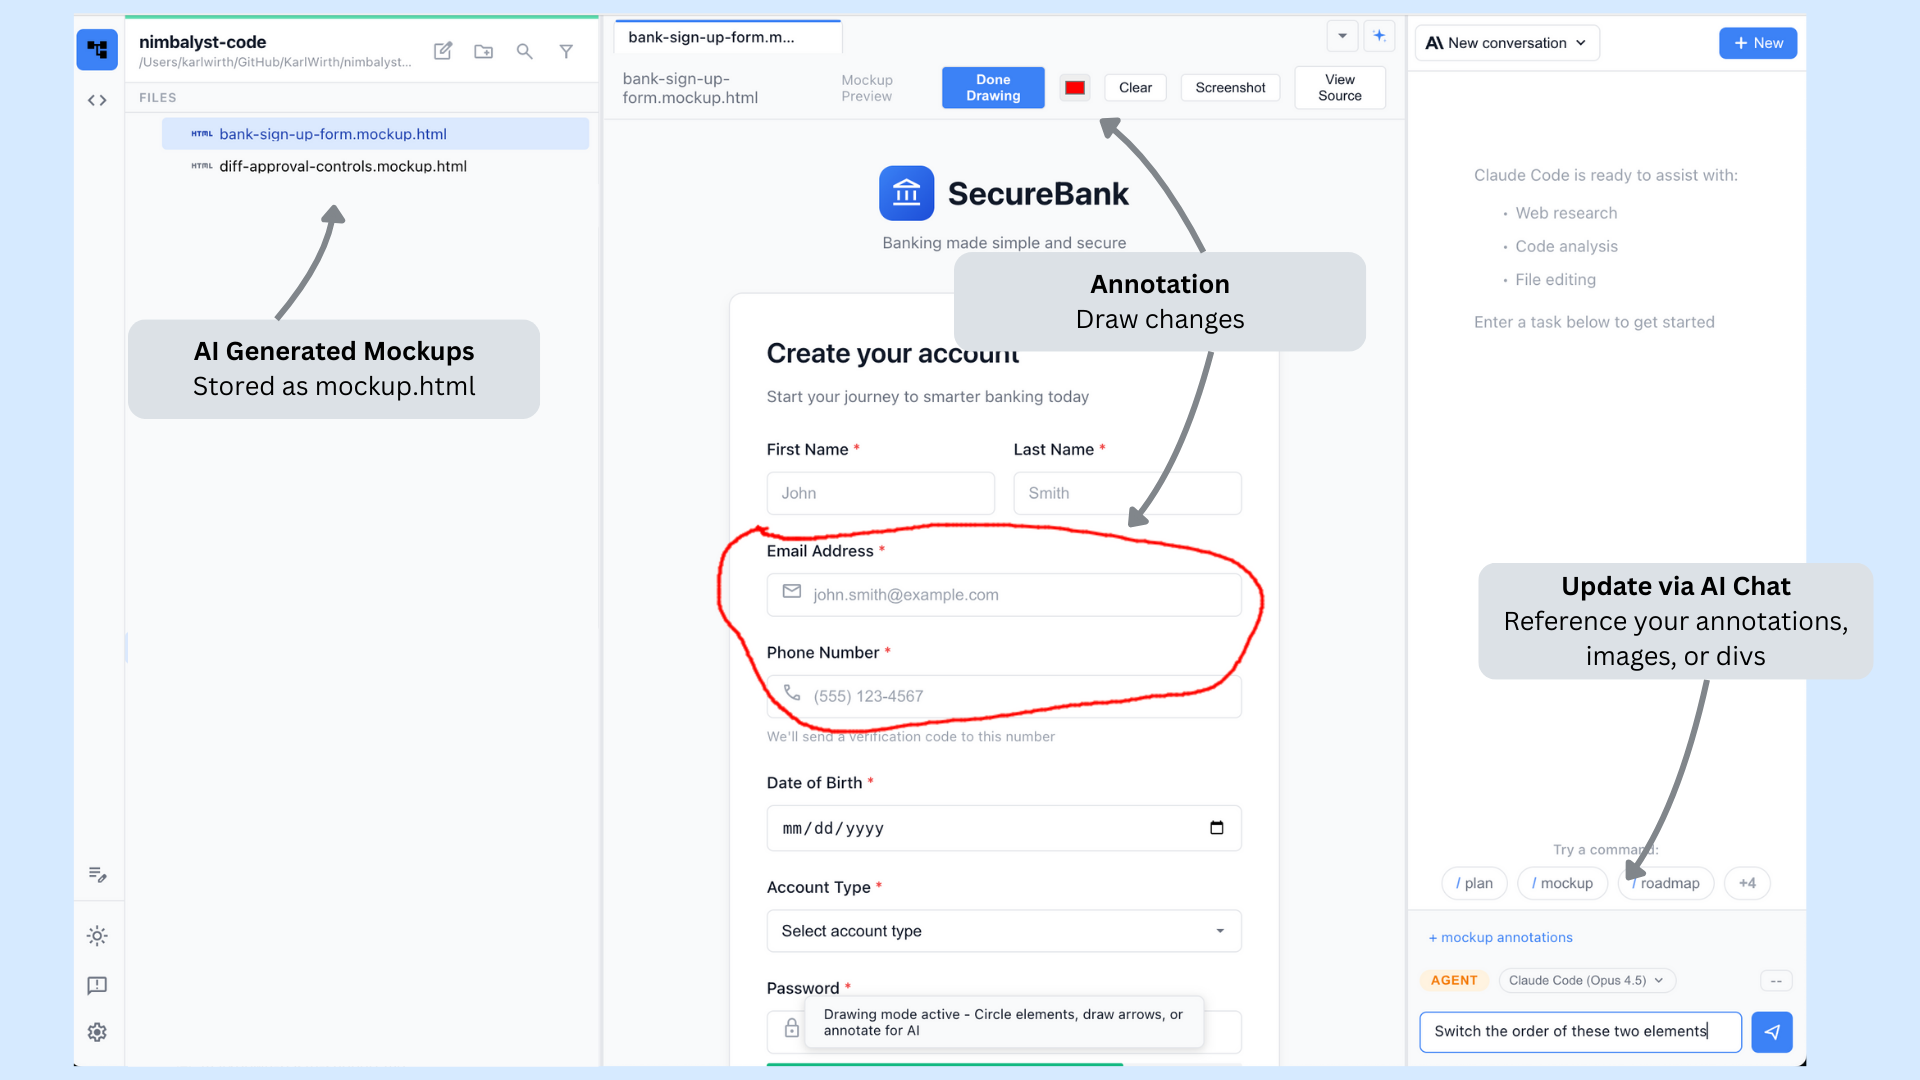
Edit it in three ways:
- Directly in the HTML
- By selecting an element and asking the AI to modify it
- By drawing annotations on the mockup and then asking the AI to make the change you marked
Multi-Screen Flows
Put multiple mockup screens on a Project Canvas to design a complete flow: checkout, onboarding, settings, or anything else that spans more than one screen.
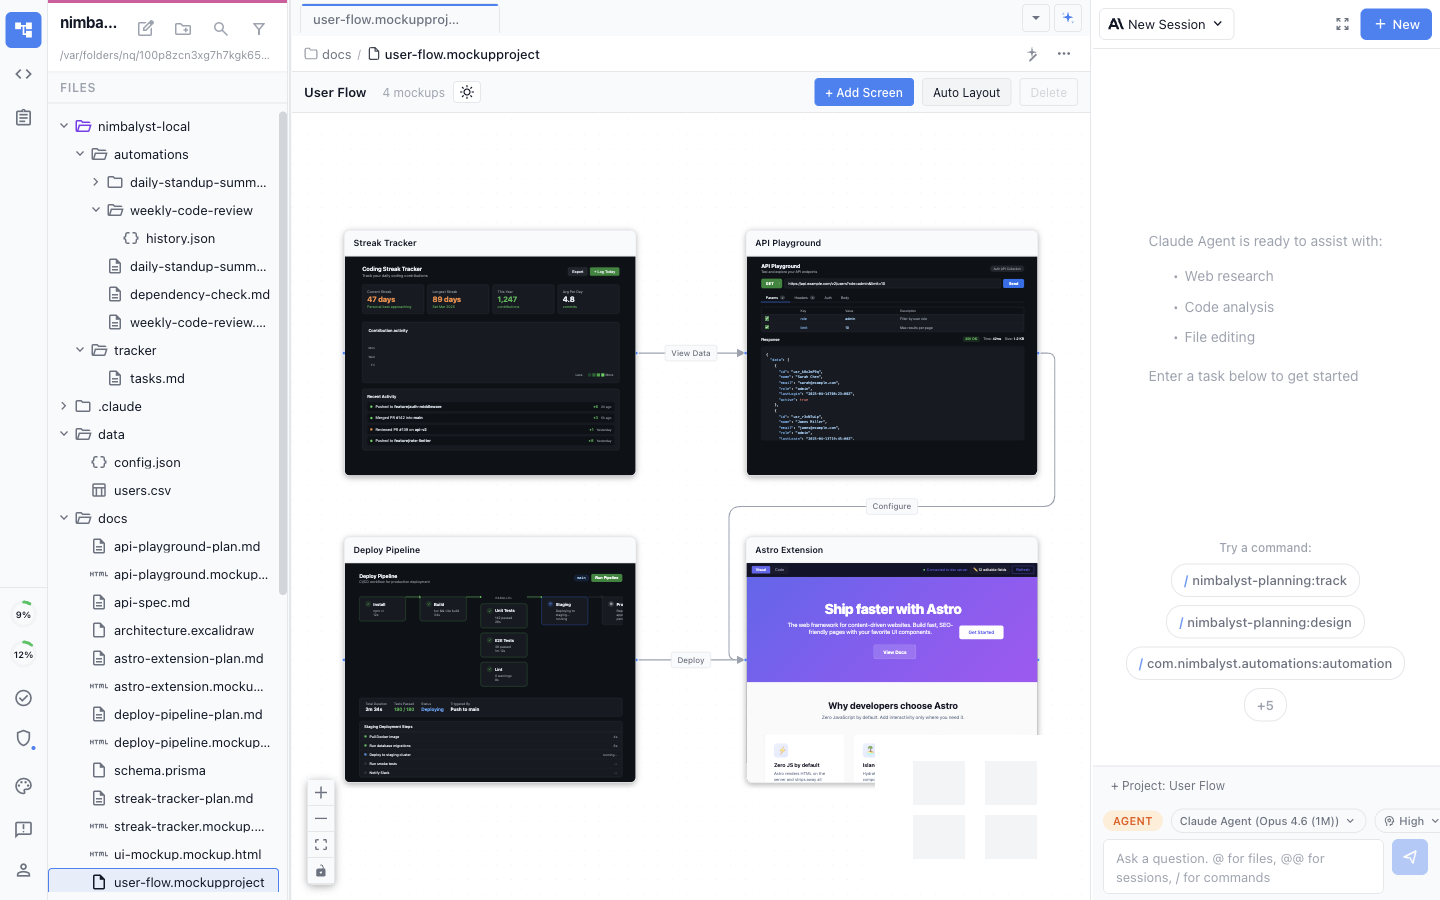
On the canvas:
- Drag screens around to arrange them spatially
- Draw connections between screens to show navigation flow, and label them (click, hover, navigate)
- Add existing
.mockup.htmlfiles as live file cards - Ask the agent to create the screens and arrange them for you
- Click into a card to edit the mockup in place
Project boards are stored as .canvas files. Older .mockupproject files open in a compatibility view that can convert them to the current Canvas format.
Insert a Mockup into a Markdown Document
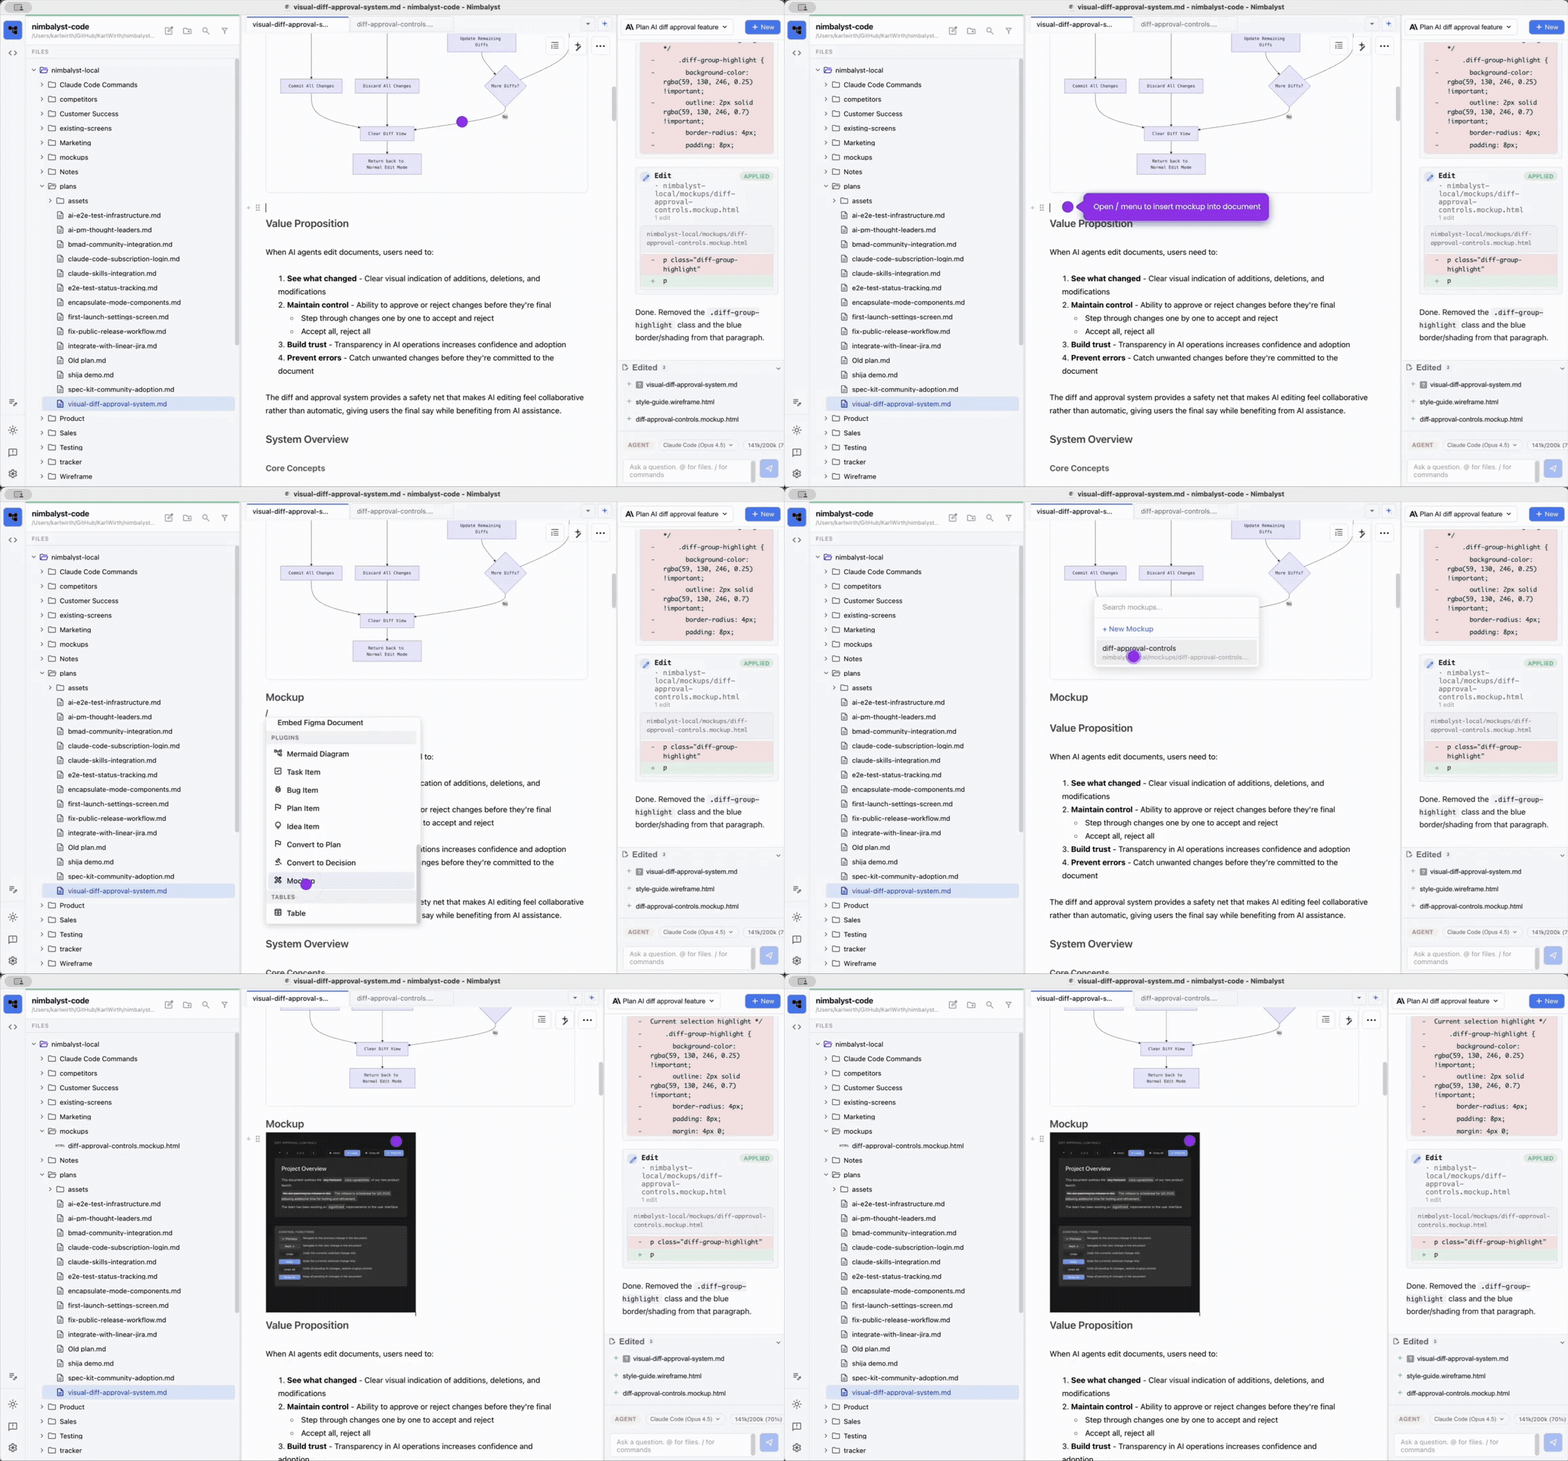
Type / in a document and insert a mockup. Click the embedded mockup to edit it in place.
File Type and Storage
Mockups are .mockup.html files. By default new mockups are saved under nimbalyst-local/mockups/ in your project, but you can keep them anywhere.
Working with the AI
Tips for Better Results
- Be specific about layout: "Two-column layout with 30% sidebar" beats "add a sidebar"
- Reference known products: "Style it like the Stripe dashboard" gives the AI a clear design reference
- Describe interactions: "When hovering over a row, show a blue highlight and a delete icon on the right"
- Iterate in small steps: make one change at a time so you can evaluate each iteration
What the AI Sees
When you ask the AI to edit a mockup, it:
- Captures a screenshot of the current rendered mockup
- Reads the HTML source code
- Sees any annotations you've drawn
- Understands which element you've selected (if any)
This multi-modal context means you can say "make the thing I circled bigger" and the AI knows what you mean.
Design-to-Code Workflow
Mockups are real HTML and CSS, which makes them a useful bridge between design and implementation:
- Design in mockups: iterate on the visual design with AI assistance
- Review with stakeholders: share the rendered mockup for feedback
- Extract patterns: use the mockup's HTML/CSS as a reference when implementing the production UI
- Maintain alongside code: keep mockups updated as the product evolves
File Format
Mockups use standard HTML with inline CSS. No build tools or frameworks required.
<div style="font-family: system-ui, sans-serif; max-width: 800px; margin: 0 auto;">
  <header style="padding: 16px; border-bottom: 1px solid var(--nim-border);">
    <h1 style="color: var(--nim-text);">Settings</h1>
  </header>
  <main style="display: flex; gap: 24px; padding: 24px;">
    <nav style="width: 200px;">
      <!-- Sidebar content -->
    </nav>
    <section style="flex: 1;">
      <!-- Main content -->
    </section>
  </main>
</div>
Using var(--nim-*) CSS variables ensures your mockup adapts to light and dark themes automatically.