Start in Your Coding Agent
Use the Nimbalyst Wiki in Claude Code, Codex (CLI or app), Cowork, Cursor, VS Code, or any MCP agent without the Nimbalyst app: install, start a wiki, and read and edit it in your browser. Free, no account.
You can use the Nimbalyst Wiki without the Nimbalyst app. Your coding agent writes the wiki as files in your repo: markdown for text pages, plus drawings, mind maps, spreadsheets, data models, mockups, canvases, and interactive HTML pages in their own formats. You read and edit it in your browser. It is free, open source, and needs no account. For what the wiki is for, see the Nimbalyst Wiki Overview, and for the kinds of pages your agent can build, see Everything a Page Can Hold.
Guides: step by step, keep a project wiki with Claude Code, keep a project wiki with Codex, or use the same wiki in Cursor, VS Code and Cowork.
Three ways to use the wiki
The wiki is one set of pages. You can work with it in any of these, and switch between them at any time:
| What you get | Cost | |
|---|---|---|
| Your coding agent and browser | Claude Code, Codex (CLI or app), Cowork, Cursor, VS Code, or any other MCP agent writes the wiki. You read and edit it in your browser. | Free, no app or account |
| The Nimbalyst app | The same files in Wiki mode, with visual editing of mockups, diagrams, and 2x2s next to your sessions, tasks, and code. | Free |
| Nimbalyst Wiki Teams | One shared wiki that you, your teammates, and all of your agents edit in real time. | Paid, free during beta |
This page covers the first. See Wiki in the Nimbalyst App for the app and Nimbalyst Wiki Teams for the team wiki.
Claude Code
Install the Nimbalyst Wiki plugin:
/plugin marketplace add nimbalyst/nimbalyst-wiki
/plugin install nimbalyst-wiki@nimbalyst-wiki
Then run /nimbalyst-wiki:setup. Claude asks who the wiki is for and builds a Home page, a writing guide, and starter pages from your README and docs. Use /nimbalyst-wiki:capture at the end of a session to record what was decided, and /nimbalyst-wiki:recall to ask what the wiki says or decided. For a short tour of the plugin first, run /nimbalyst-wiki:start. See the Wiki Plugin and nim CLI Reference for every command and setting.
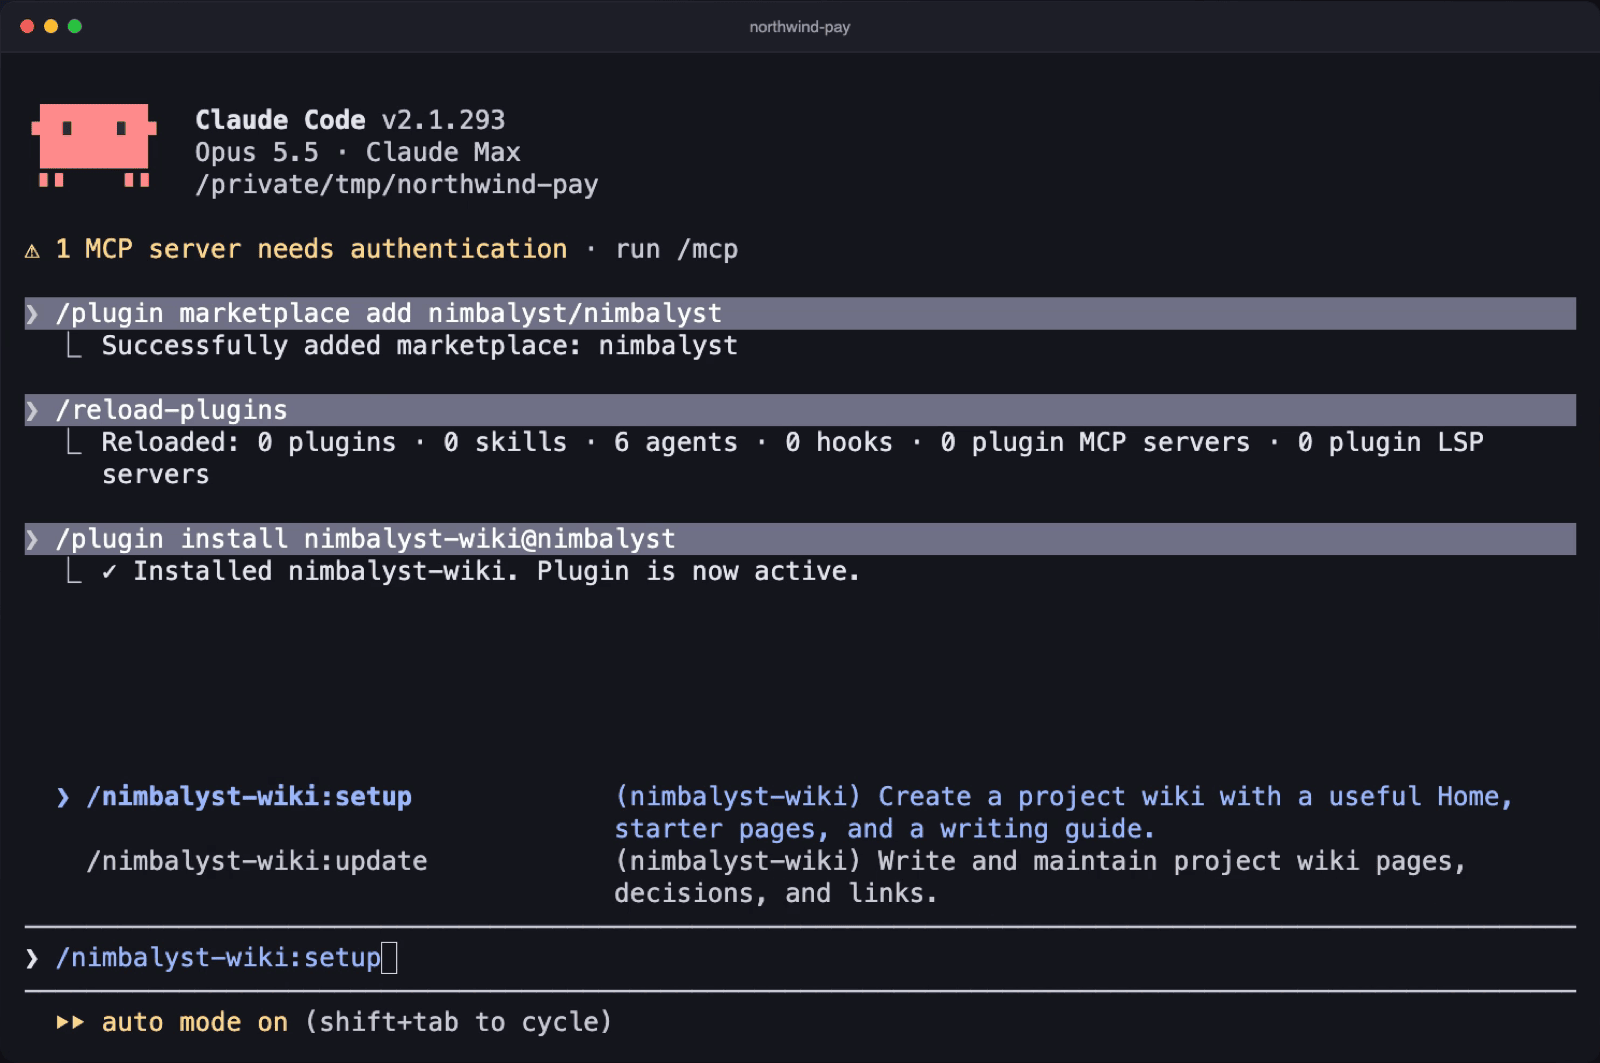
Install the plugin, then run /nimbalyst-wiki:setup.
Codex CLI
The same plugin installs in the Codex CLI:
codex plugin marketplace add nimbalyst/nimbalyst-wiki
codex plugin add nimbalyst-wiki@nimbalyst-wiki
It brings the same start, setup, capture, recall, and update skills. Codex does not run the plugin's session reminders, so ask it to record what you decided. See the Wiki Plugin and nim CLI Reference.
The Codex app, Cowork, Cursor, VS Code, and other agents
Other agents reach the wiki through nim mcp, an MCP server in the nim CLI. Install the CLI (Node.js 22 or later):
npm install -g @nimbalyst/cliThen register the server with your agent.
Codex app (or the Codex CLI without the plugin):
codex mcp add nimbalyst-wiki -- nim mcpThe Codex CLI, the Codex app, and the Codex IDE extension share the same settings, so one command adds the wiki to all of them. Restart the Codex app after adding it.
Cursor: add this to .cursor/mcp.json in your project:
{
  "mcpServers": {
    "nimbalyst-wiki": {
      "command": "nim",
      "args": ["mcp", "--workspace", "${workspaceFolder}"]
    }
  }
}
VS Code: add this to .vscode/mcp.json in your project, then use the wiki from Copilot in agent mode:
{
  "servers": {
    "nimbalyst-wiki": {
      "command": "nim",
      "args": ["mcp", "--workspace", "${workspaceFolder}"]
    }
  }
}
Cowork: add the same server to the Claude desktop app's MCP config (claude_desktop_config.json), with --workspace set to the folder that holds your wiki. If the app cannot find nim, use the full path that which nim prints.
Any other MCP agent: run nim mcp as a stdio server. --workspace chooses the project and --location the wiki folder inside it.
Once the server is connected, ask your agent to "start a wiki for this repo." It creates the wiki with the initLocalWiki tool and writes the first pages. Every agent uses the same tools on the same files, so a wiki started in one agent is ready in the others.
Read and edit it in your browser
With the plugin in Claude Code or the Codex CLI, ask your agent to "open the wiki in my browser." The browser app ships inside the plugin, so there is nothing to install.
From a terminal, or with another agent, run nim wiki serve. The browser app installs with the nim CLI, so there is nothing else to add:
nim wiki serveEither way, the wiki opens in your browser with the page tree, the page editor, typed pages with their fields, and type tables. Drawings, mind maps, spreadsheets, data models, mockups, and canvases open in their own editors, and you can create them from the New page menu. Edits save straight to the files, and changes your agent makes show up live. The server listens on your machine only and requires the token in the URL it opens.
For more on the browser view, including what you can edit there and how it stays private, see Read and Edit the Wiki in Your Browser.
Ask your agent for an HTML page, such as "make a clickable map of the product with a box for each area page," and it works in the browser view too: click a box and the page it links to opens. See Interactive HTML pages.
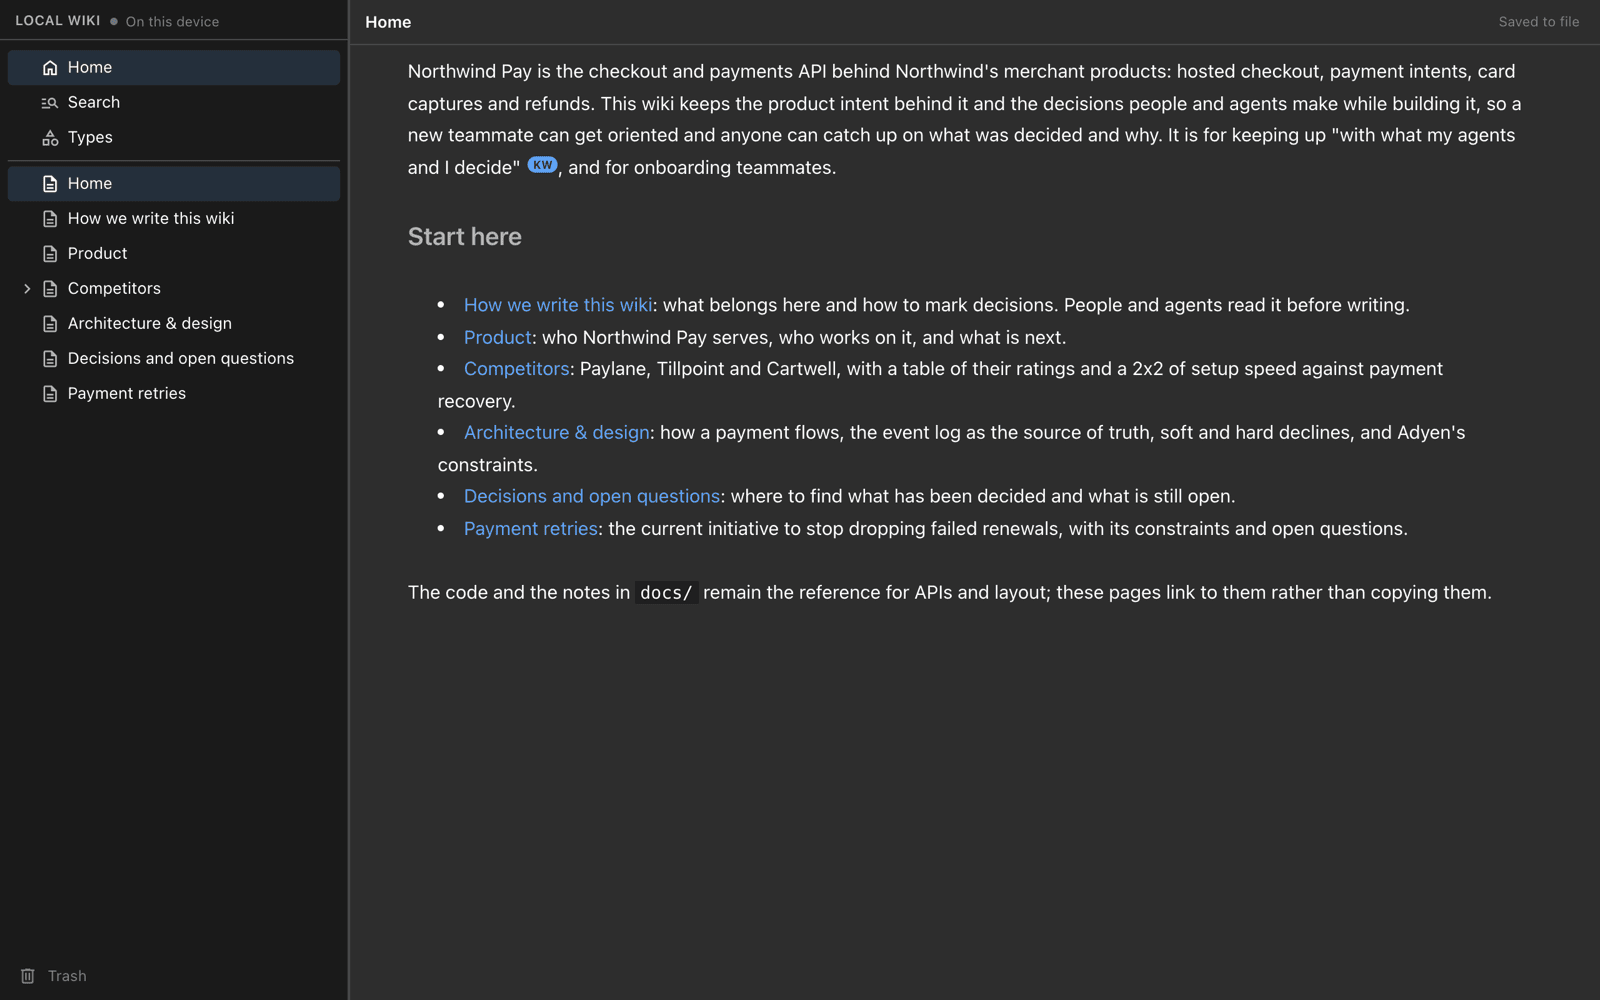
The local wiki in your browser with nim wiki serve, after setup wrote Home, the writing guide, and starter pages.
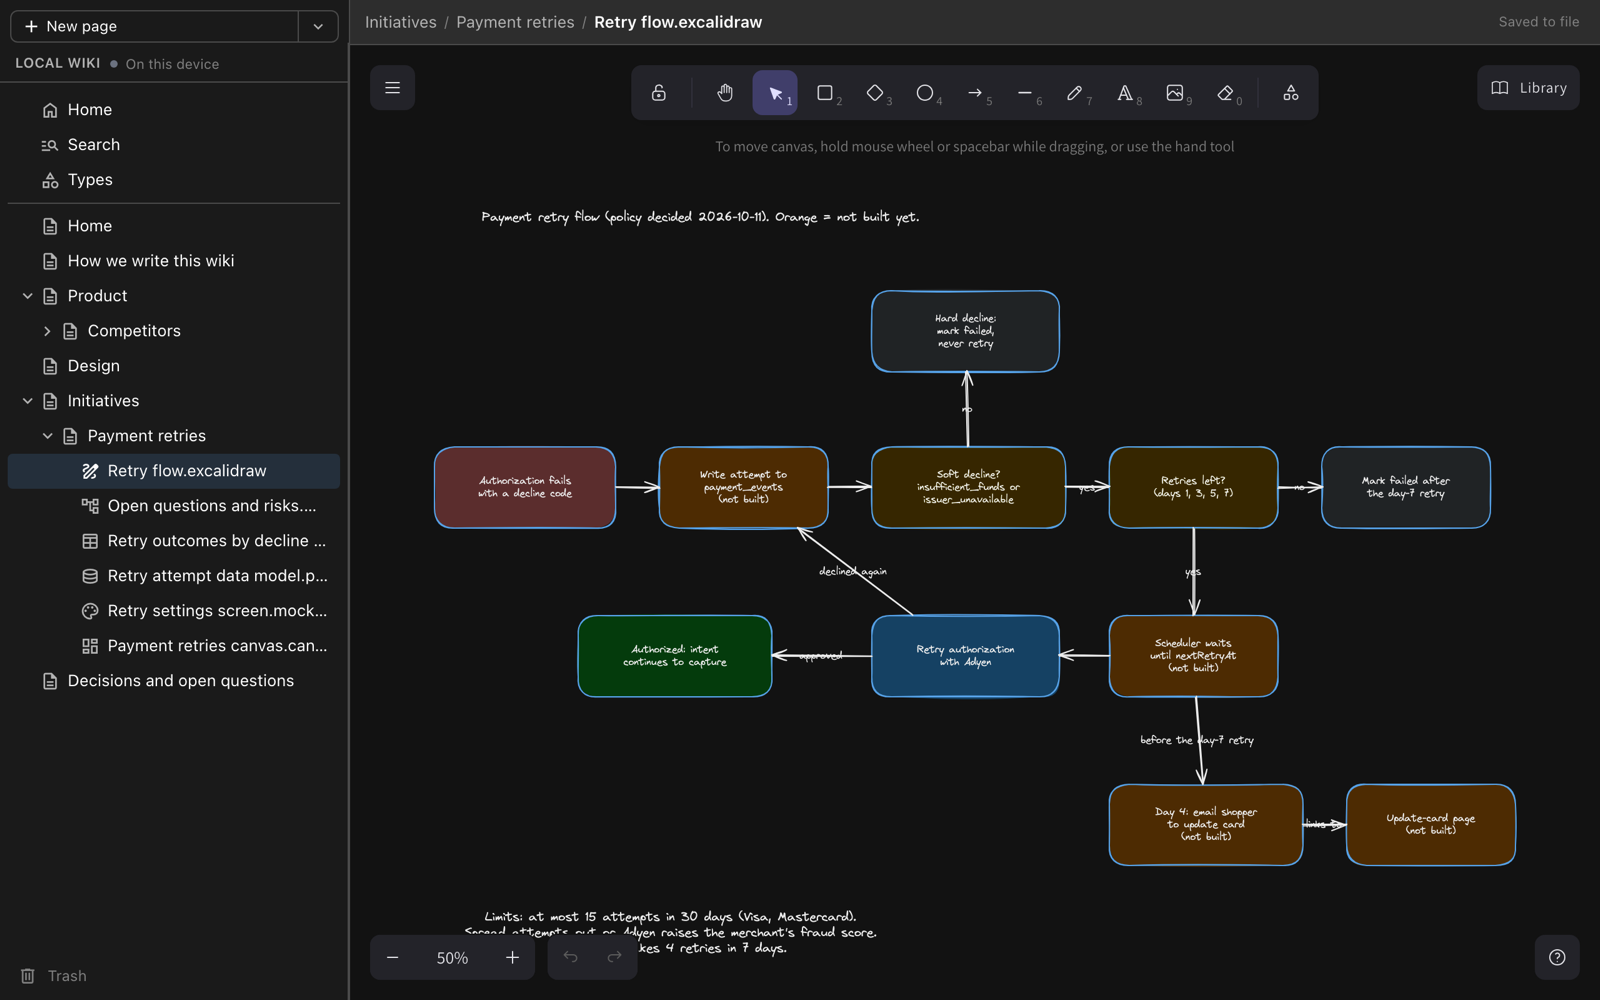
A drawing your agent made, open in the browser's Excalidraw editor. The mind map, spreadsheet, data model, mockup, and canvas under Payment retries open the same way.
Where the files live
The wiki is nimbalyst-local/wiki in your project by default, which git ignores. To check it in and share it through git, start it in another folder:
nim wiki init --location docs/wikiSee Local Wiki Files and Location for how pages, child pages, typed pages, and drawings and other editor pages map to files.
Open source
The Nimbalyst Wiki plugin, the nim CLI, its MCP server, and the browser app are MIT licensed. The plugin's code is at github.com/nimbalyst/nimbalyst-wiki, where you can read it, file issues, and send pull requests. The Nimbalyst app is MIT licensed too, at github.com/nimbalyst/nimbalyst.
Later: the app and your team
When you open the project in Nimbalyst, the wiki is already there in the Local section of Wiki mode, with nothing to import. See Set Up Your Wiki. To share it with your team, see From Your Agent to the App to Your Team.